Finding that "Sweet Spot" in Heat Drying during Restoration (Part 2)
Heat science, and day-to-day use of heat on restoration drying jobs
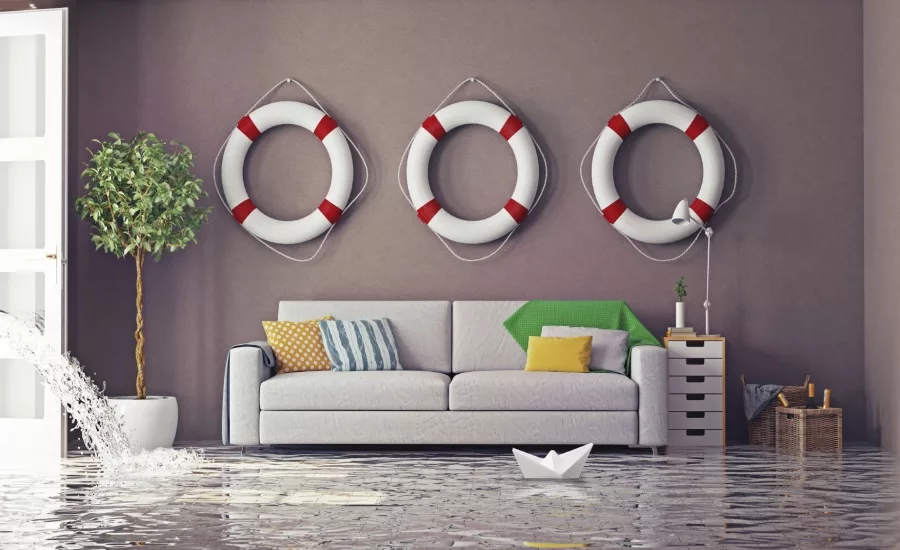

Furnishings like candles, plants and fish tanks are sensitive to temperature as are some foods like candy and wines.

Take care to insure that this hot air is not focused directly onto sensitive surfaces like hardwood flooring. It is possible to shrink and distort flooring with too much heat.

UL and CSA certifications will provide you and your equipment with some positive standing in the eyes of the law.
Part 1 of this series covered some of the physical changes that occur when you add heat to water and wet materials. That was the science side of heat. Part 2 applies this to the day-to-day use of heat on restoration drying jobs. The information here should help guide your thinking within the existing legal framework.
There are a couple of philosophies concerning application of heat in restoration drying. First, the “Heat Only” advocates contend that heat is all you need. It is applied exclusively and universally on all drying projects. These folks ventilate the evaporated water outside the structure, relying on the outside air to provide the lower vapor pressure necessary for effective drying. Of course, the higher the moisture-content of the outside air, the less effective this venting strategy becomes. Then, there are those who consider heat as just another tool, using outside air when appropriate and convenient, but most often combining heat with LGR dehumidification and airflow strategies.
How Much Heat? Where and When?
The big question is “How MUCH heat?” How many BTUs should I bring to the job? There are no set standards guiding heater sizing for a restoration job. Some common HVAC calculators say for a 1000 cubic foot room with average insulation, 2000 BTUs will raise the temperature 10°F and that the same room with poor insulation requires 4200 BTUs. These figures ignore the requirement of around 1000 BTUs to evaporate each pint of water and the BTU load of raising the temperatures of materials in the room.
The actual process of sizing heaters for a specific situation involves professional judgment considering several variables, such as: outside weather, type of construction, duration of the wetting, materials and finishes affected, and whether there are occupied areas nearby. In addition, there will often be non-removable or specialty contents, other restoration equipment, and possibly other temperature concerns specific to the job.
Keep in mind that heat drying takes conditions well beyond the normal seasonal fluctuations. Heater sizing must consider the ability of the drying chamber to dissipate heat and to control the elevated humidity in the air. The restorer should pre-determine the temperatures to be reached and use thermostat controls to enforce that limit.
Some restoration professionals use heat primarily on heavy, dense materials like concrete, plaster, and masonry, but many professionals have proved heat effective for drying the wood structure of a building. Drying structural lumber with heat is one of the more predictable and forgiving heat applications. New users should train on open structural members before moving on to more sensitive applications.
The simplest time to apply heat is at the beginning of the drying job when there is a lot of surface moisture. Surface moisture responds very rapidly to heat because it does not have to diffuse through the material. During the initial stage of drying, the rapid evaporation possible with added heat can increase the air’s dew point to above the temperature of the rest of the structure. This can cause unwanted condensation (often in hidden locations) which can then cause secondary damage within the structure. Unwanted condensation is common when cooler surfaces are present (such as the cool interior of exterior walls.)
Most restoration monitoring effort is focused on the affected area. But in heat drying you must know what is happening in the “unaffected” areas as well. The absence of vapor barriers on interior walls and ceilings, plus the many penetrations for utilities and HVAC makes high humidity levels in unaffected areas virtually inevitable. Often any condensation that occurs dries as the restoration process continues, but this is important to monitor and verify.
Unless you have an overabundance of BTUs to focus on a small area, it will be hard to overheat an actual wet surface, because the BTUs required for evaporation have such a strong cooling effect. The water, as it evaporates, takes most of the incoming heat energy with it. But as the surface dries, this evaporative cooling goes away and material temperatures can rise quickly. This is why it is so important to monitor the progression of the job when using supplemental heat.
Some General Concepts
Several issues help determine the maximum safe temperature. Structures and their contents are a complex mixture of various fabrics, woods, plastics, metals and finishes. Some materials are easily damaged by high heat while others can handle high temperatures without consequence. Furnishings like candles, plants and fish tanks are sensitive to temperature as are some foods like candy and wines (see candles image above).
Melting can be a concern, but more commonly you will see material weakness (sagging or failure) occurring far short of melting, such as occurs with plastic mini blinds. Watch for over drying wood trim. Over drying can cause irreversible shrinkage and cracking. The white glue used in some crown molding and finger jointed trim lumber begins to soften around 90°F (if the molding or trim has internal stresses, the joints can open.)
According to the Gypsum Association, gypsum wallboard (drywall) should not be exposed to temperatures above 125°F for extended periods of time. This is because the gypsum crystals lose their water-of-hydration and their fire resistance degrades drastically. Drywall seam compound is usually good but depends on mixing and curing conditions unknown to the restorer.
Generally, anything over 95°F is getting into the zone of watchful concern. Those who choose to go to 120°F would be wise to start small and closely monitor the results until developing a good professional feel for the rapid changes possible at these high energy conditions.
The outlet temperature of any heater is going to be hotter than the desired target temperature. Take care to insure that this hot air is not focused directly onto sensitive surfaces like hardwood flooring. It is possible to shrink and distort flooring with too much heat (see damaged hardwood floors image above). This is because wood flooring has an asymmetric evaporation profile, i.e. — its top surface evaporation is very different than the bottom. Solid hardwood floors can be resurfaced if needed; but engineered hardwood flooring, once soaked, is usually removed. Any delicate or thin construction should be watched carefully for cracking or over drying. Keep in mind that removing too much water from a material can cause significant shrinkage, which is most often irreversible.
Focusing heat down around the wet material is an ongoing problem because hot air is less dense than colder air, so hot air is always trying to rise to the ceiling (this effect can help when applying heat to the underside of a floor.) Directing the heat to the wet materials and then tenting with polyethylene sheeting is effective. Floating carpet with heated air is another common method. Where smaller-scale tenting is impractical the usual practice is to use the existing structure to create a drying chamber and use air movement to transfer the heat and move the moisture.
Supplemental heat is a necessity in cooler environments to accelerate drying, but heat can assist almost anywhere the surface temperature of wet materials is under 75°F. Heat can also be used to support other drying methods. For instance, in cool environments it can bring temperatures up to the effective operating range of dehumidifiers. Moving up in the temperature range: Advances in LGR technology have resulted in dehumidifiers with operating ranges up to 120° and for standard LGR dehumidifiers there are pre-cooling amplifiers that increase water removal rates at elevated temperatures. These advances can provide the restoration professional with all the benefits of using heat to raise the vapor pressure of the wet materials while still allowing use of dehumidifiers to reduce the vapor pressure of the air. And finally, when running portable desiccant dehumidifiers in colder weather, heat can be added to the reactivation input air to increase the regeneration quality. This can provide noticeably drier process outlet air.
There are many ways to successfully employ heat, like any powerful tool. But it is all based on a good understanding of heat flow, moisture removal, and air movement.
Drying Too Fast
Some people swear they have seen heat drive moisture deeper into a material. What happened here is they chose the wrong interpretation of what they saw. Here’s the full story on that scenario: After applying heat to a material for a period of time they saw the evaporation fall off, and, according to noninvasive meters, the material appeared to be dry. The truth is that if too much heat (usually with strong air flow) is applied, the material’s surface layer quickly dries out; the evaporation rate falls off as the outward moisture movement (by capillary action and diffusion) falls off because of the reduced conduction of the dry surface layer. This problem is sometimes referred to as “case hardening”. The surface was dried too fast... faster than the internal moisture could flow to the surface. This is similar to a baked loaf of bread — a hard crust with a moist inside. Baking hardens the crust but leaves the inner bread soft and moist. In restoration drying, the outside of materials shouldn’t be dried faster than moisture can move to the surface. Case hardening can be very deceiving, because the material looks and feels dry. The way to look for this problem is to check using a penetrating type meter. If the interior reads moist, then the material needs some time to re-establish its moisture distribution. More than once equipment has been pulled from a job only to have the inner moisture work its way out to the surface and cause problems- like finishes being applied over still wet materials.
Standards and Certifications
Some people question the value of standards-agency certifications for drying equipment. Heating equipment seems especially prone to these questions. The bottom line is UL and CSA certifications cannot guarantee being held harmless against product liability claims, but they do help ensure that (short of gross negligence) an operator will not fall to a summary finding of fault. Possession of these certifications can be extremely important as they show, via a recognized third party, that the equipment conforms to a good faith, nationally recognized consensus standard of safety and performance. UL and CSA certifications (see ETL/UL image above) will provide you and your equipment with some positive standing in the eyes of the law. Nonetheless, your knowledge and responsible use of the heating equipment can make or break a case if something does somehow go wrong.
In the end it is the restorer’s responsibility to balance the material water content and drying temperature with the moisture removal rate based on the equipment available... all the while keeping in mind what temperature the site’s materials can support without being damaged. These factors all work together to determine your optimal setup for the current conditions on the job.
Understanding the science helps you develop the art.
Want to read the original two-part series by Larry and Mike published in 2013? Click here for Part 1 and Part 2.
Looking for a reprint of this article?
From high-res PDFs to custom plaques, order your copy today!


