Weekly Hands-on How-To powered by KnowHow
How to Conduct a Pack-Out on Location

In the aftermath of property loss, the role of a restorer goes beyond the physical task of a pack-out. It’s not merely about relocating items; it’s about handling the remnants of the disrupted lives of your clients with care and precision. Each item can represent a huge piece of someone's story, and it’s your job to ensure these pieces are respectfully preserved.
At KnowHow, we recognize the importance of this dual responsibility - practical efficiency coupled with a touch of empathy. This edition of our weekly hands-on how-to series is designed to navigate you through the processes of packing, categorizing, and transporting contents from a loss. More than just logistical steps, it's about understanding the impact these damaged items can have on the lives of your clients and handling them with care.
Now, let's dive into the essentials of efficiently packing and moving contents, ensuring every item's integrity from start to finish.
Step 1: Arrive on Site before Movers
To ensure an efficient and safe pack-out process, it's essential to have the packing and inventory crew arrive at the location before the movers. This initial step sets the stage for an organized workflow. The early presence of the packing and inventory crew allows them to assess and inventory the contents thoroughly, devise an effective packing strategy, and prepare all necessary materials and equipment.
Step 2: Develop a Strategic Plan for the Contents Pack Out
Conduct a thorough analysis of the location's layout to determine the optimal sequence for content removal. A well-planned approach boosts productivity and reduces the risk of damage or loss.
Key factors to consider include the size, weight, and fragility of the items, along with any specific instructions from the customer. Collaboration between the packing and inventory crew is vital to ensure uniform understanding and smooth execution of the plan. This coordinated effort ensures that every step of the pack-out is conducted with precision and care.
Step 3: Capture Detailed Photographs and Videos of Content Locations
Using a camera or smartphone, document the arrangement of items in each room, ensuring the photographs are clear, well lit, and capture the contents from multiple angles. This visual record is invaluable, serving as a precise reference during the pack-out process and aids in accurately recreating the original layout when items are returned.
Looking for quick answers on restoration, remediation and cleaning topics?
Try Ask R&R, our new smart AI search tool.
Ask R&R →
Additionally, record a detailed video walkthrough of the entire home. This further documentation adds an extra layer of detail, providing a comprehensive view of the contents and their initial condition and positioning.

Step 4: Discuss Valuable and Sensitive Items with the Customer
Before starting the pack out, it's imperative to have a conversation with the customer about certain valuable and sensitive items like guns, jewelry, medication, and expensive personal belongings. Inform the customer that they are responsible for removing and cleaning these items themselves, as it's the company's policy not to take possession of such items.
If the customer opts for the company to handle other small or expensive items, ensure they lay out all jewelry and photograph each item. A detailed inventory of these items should be completed to guarantee their safety and security.
Step 5: Tag and Prepare Large Items, Furniture, and Non-boxed Contents
Use uniform color tags for consistency throughout the job. Each tag should include an item description, the job name, and a space for an inventory number, to be added later in the upper right corner by the inventory personnel.
For items with multiple parts, such as a bed, label each part with a number and a sequential letter (e.g., 15a, 15b, 15c). Secure the tags using rubber bands, wire ties, or safety pins, and use tape for placing tags on inconspicuous areas like the inside of a bed frame. Tape metal bed foundations together to prevent separation of parts. Small components like screws should be bagged, labeled, and attached to the corresponding item. Electronics require tagging and bubble wrapping for protection. Finally, encase all couches and mattresses in furniture and mattress bags to safeguard them during the move.
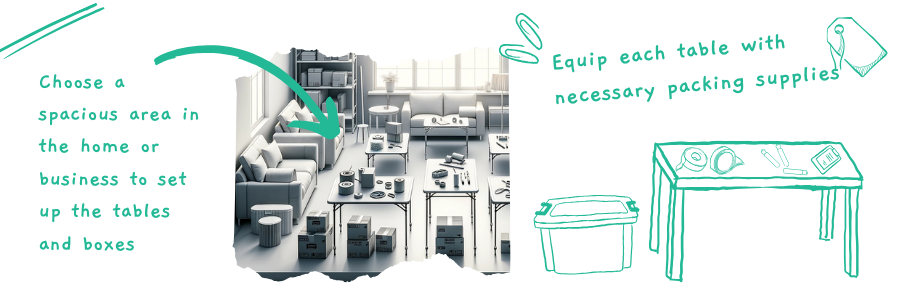
Step 6: Organize Processing Tables for Efficient Loading and Packing
Efficiently setting up processing tables for loading and packing boxes is a critical step in the moving process:
- Choose a spacious area in the home or business for the tables, ensuring enough room for movement and box accommodation.
- Clear any obstacles or clutter from this area to create a safe, organized workspace.
- Set up sturdy, stable tables or workbenches capable of supporting the weight of packed boxes.
- Arrange the tables for an efficient workflow, possibly dedicating different tables for various items like fragile goods, electronics, or miscellaneous items.
- Equip each table with necessary packing supplies—tape, bubble wrap, packing paper, and markers.
- Assign a knowledgeable crewmember to each table to oversee and assist with the packing.
- Ensure adequate lighting at the tables for optimal visibility.
- Communicate specific packing instructions for different items to the crew, ensuring secure and space-efficient packing.
- Regularly check the tables, offering support and addressing any packing issues.
- Properly label the packed boxes with room designation and handling instructions, aiding in the subsequent unpacking and organization.
Step 7: Box Making During the Packing Process
To maintain efficiency and organization during the packing process, it's essential to make boxes simultaneously. Here's a systematic approach to making boxes as you pack:
- Gather essential materials: cardboard boxes, packing tape, and packing paper.
- Choose the right box size, considering the weight and size of the items.
- Evaluate each item's size and fragility to determine the most protective packing method.
- Place a cushioning layer of packing paper or bubble wrap at the bottom of each box.
- Arrange items in the box, allowing room for extra padding if necessary.
- Fill gaps with crumpled paper or bubble wrap to stabilize items during transit.
- Securely close and tape the box, ensuring all seams are well sealed.
- Clearly label each box with its contents and designated room.
- Continuously make and pack boxes, adjusting your pace based on the number of boxes available.
- Organize completed boxes by room or category in a designated area.
- Keep making and packing boxes until all items are securely packed.
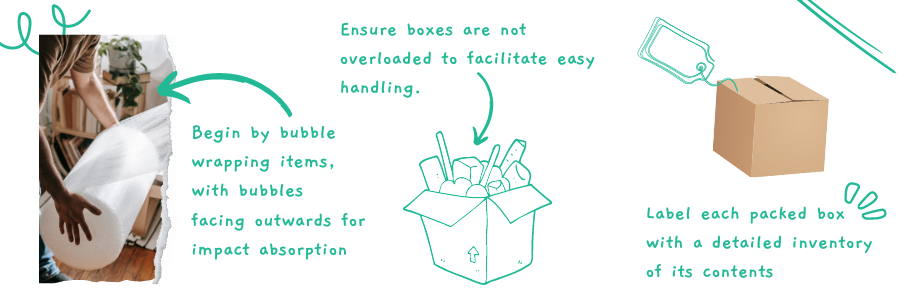
Step 8: Load Contents into Boxes
Begin by bubble wrapping items with the bubbles facing outwards for maximum impact absorption; secure with clear packing tape without adhering it directly to the item. For breakables, line the box bottom with three layers of packing paper, wrapping each item in bubble wrap or packing paper. Fill any gaps with balled-up paper, avoiding newspaper, and label the box as 'fragile' if necessary.
Ensure boxes are not overloaded to facilitate easy, injury-free handling. For dishes and delicate items, wrap each with a single sheet of packing paper or bubble wrap for high-value pieces, cushioning them with crumpled paper. Place stemware base-down, securing with adequate packing materials.
Label each packed box with a detailed inventory on the top left-hand corner and add your initials. For wet or rush items, use the appropriate sticker on the box's upper right corner. Finally, seal the boxes with tape over the top seam.
Step 9: Update Inventory during the Removal of Contents
As contents are being packed out, maintaining a detailed inventory is essential. This process involves recording descriptions, conditions, and photographs of both boxed and tagged items.
The inventory is a reliable record for tracking and organizing items throughout the pack-out. Start by numbering or labeling for easy identification, and consider digital tools to streamline the process. A systematic and accurate inventory helps minimize the risk of loss or damage to the items.
Step 10: Place found money into a plastic bag and return it to the homeowner
This includes loose change. Do not take any money off-site unless the house is vacant, in which case the money should be given to the production manager and then taken to the customer as soon as possible.
Step 11: Organize Boxes for Efficient Removal
Stack boxes neatly and securely by the door of their designated room. This arrangement ensures stability, preventing potential falls and damage to contents. Storing boxes near the room's exit streamlines the removal process, allowing for efficient and systematic transportation from the location.
Step 12: Safely Remove Inventoried Contents from the House
When removing inventoried contents from the house, handle each box and item with care. Adhere to the established inventory list to confirm that all items are accounted for and appropriately labeled. Utilize proper lifting techniques and equipment, like dollies or hand trucks, for safe transport to the loading area.
Work closely with the packing and inventory crew to ensure a smooth, coordinated process. Update the inventory to record the removal of each item. Take extra care with fragile items by using suitable packing materials for added protection. Confirm that every box and item has an inventory number before loading it onto the truck, and follow the designated truck-loading procedures.
Step 13: Prepare and Pack the Transport Truck
To ensure safe transport of the packed contents, proper preparation and packing of the truck are vital:
- Start by ensuring the truck is clean and in good working condition, checking for any damages that might affect the contents' safety during transit.
- Organize the contents in the loading order to streamline both packing and unloading.
- Load heavy and sturdy items like furniture or appliances first, towards the truck's back, for even weight distribution and stability.
- Secure larger items using straps, ropes, or bungee cords to prevent movement and reduce damage risk.
- Protect fragile items with moving blankets or padding, wrapping delicate items individually before placing them in the truck.
- Carefully stack boxes, placing heavier ones at the bottom and lighter ones on top for stability.
- Fill gaps with soft items like pillows or blankets to minimize shifting and damage.
- Maintain a detailed inventory of contents being loaded, which is essential for tracking during unloading.
- Ensure all items are securely packed, properly labeled, and organized for easy unloading and organization at the destination.
- Finally, close and lock the truck doors securely, performing a final inspection to confirm that everything is properly packed and secured for the journey.
Note: This Weekly Hands-On How-To was based on this template in KnowHow’s template library.
At KnowHow, we’ve earned that many entering the restoration field may not have a background in related areas like construction. This highlights the importance of a training and knowledge resource that not only instructs, but also mentors.
With KnowHow, the onboarding of new staff becomes a streamlined, intuitive process and enhances their ability to provide quick and accurate solutions on the job. We aim to empower your team with a deep understanding of both the 'what' and the 'how' of essential tasks, giving confidence to every member, regardless of their experience level. Whether it's mastering complex tasks like handling contents after a disaster or navigating the day-to-day challenges of restoration work, KnowHow is there to guide every step.
To discover more about how KnowHow can enhance your team's capabilities and confidence, visit us at tryknowhow.com.
Looking for a reprint of this article?
From high-res PDFs to custom plaques, order your copy today!


