Weekly Hands-on How-To powered by KnowHow
How to Assess and Respond to Frozen Pipes in a Home: A Step-by-Step Guide for Restorers
Unchecked frozen pipes in a home, unfortunately, often go unnoticed until the moment they burst, and when they do, it's a race against time. In these moments, homeowners will likely turn to your team first, relying on your expert knowledge to mitigate the damage.
While many restoration companies pride themselves in their response to such incidents, too few have thoroughly documented these processes to share them efficiently with their team members and new hires.
At KnowHow, our mission is to help restoration companies deliver on their promises through confident workforces. It’s why we have hundreds of standardized industry templates available for all customers, and we’ve collaborated with R&R Magazine to share Weekly Hands-On How-To guides for your team on every aspect of restoration.
This week, we’re delving into the urgent matter of addressing frozen pipes in homes and businesses. When pipes freeze and potentially burst, rapid and skilled intervention is crucial, and today, we're here to guide you through the necessary steps. Whether this is your first encounter with such a scenario or a quick refresher, this article will ensure you are armed with the knowledge and confidence to tackle frozen pipe incidents effectively in the field.
Step 1: Understand What Causes Frozen Pipes
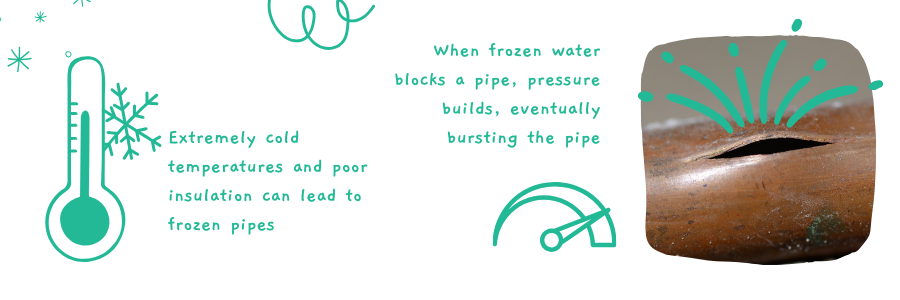
Frozen pipes occur due to various factors, such as extremely cold temperatures, inadequate insulation, improper thermostat settings, and structural cracks or gaps. The most vulnerable pipes are those outside, in basements and crawl spaces, or with insufficient insulation. During winter storms, stagnant water in these pipes can quickly freeze.
When water inside a pipe freezes, it expands. However, the actual burst happens when the ongoing water flow is halted by the frozen section, causing pressure to build up to around 25,000 PSI (far above the normal 40-65 PSI). This immense pressure eventually weakens and bursts the pipe, leading to water continuously spilling into the home until the main water is shut off.
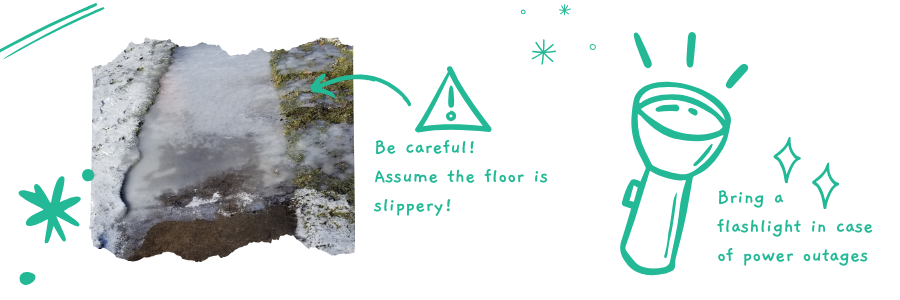
Step 2: Proceed with Caution When Arriving On-Site
When approaching a home with frozen pipes, be cautious of slippery conditions due to ice on driveways and floors. With likely power outages, a strong flashlight is essential for safe navigation.
Looking for quick answers on restoration, remediation and cleaning topics?
Try Ask R&R, our new smart AI search tool.
Ask R&R →
Step 3: Evaluate the Home for Frozen Pipes
To determine frozen pipes, check for signs like no water flow from faucets, unusual noises from pipes, visible frost on pipes, and signs of leaks or water damage. Specific faucets or fixtures with low or no water flow can indicate localized frozen areas.
Step 4: Turn Off the Main Water Supply
Shut off the main water supply by locating the main valve, typically near the water meter or where the main line enters the house. Turn it clockwise to stop the flow of water, preventing further damage.
Step 5: Open All Faucets
Open all faucets in the home to alleviate pressure and encourage thawing, addressing both hot and cold-water taps.
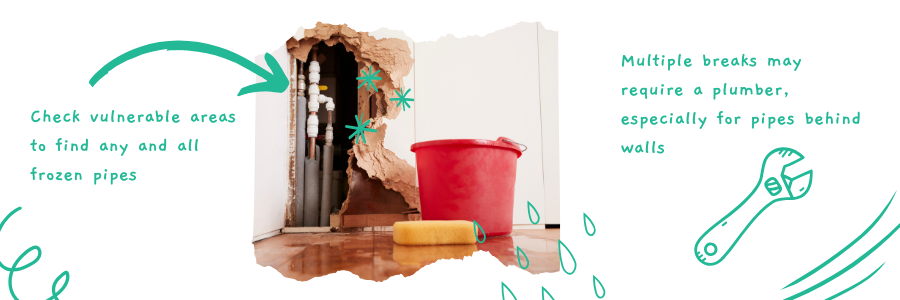
Step 6: Locate the Frozen Pipe
If faucets yield minimal water in winter, suspect a frozen pipe. Check vulnerable areas like outdoor pipes, basement and crawl space pipes, and uninsulated pipes. Multiple breaks may require a plumber, especially for pipes behind walls.
Step 7: Inspect Visible Pipes
Inspect all visible pipes for signs of damage or freezing, like cracks, leaks, bulges, or frost/ice buildup. Note any issues and check for adequate insulation.
Step 8: Double-Check Hazards
During your walkthrough, observe the furnace and thermostat settings and take pictures for insurance documentation. Inspect the circuit/fuse box and electrical outlets for water damage. If hazards are found, consult a licensed electrician.
Step 9: Develop a Detailed Mitigation Plan
Document the required steps for mitigation, particularly for extensive damage, including activating the heating system, conducting plumbing inspections, and repairing damaged doors or windows.
Step 10: Insurance Adjuster Contact and Verification
Before starting mitigation, confirm insurance coverage to avoid payment issues with contractors. The insurance company may require utility bills or homeowner interviews for claim assessment. If it is determined that this is not a covered claim, have the HVAC and plumbers bill the homeowner directly, and then provide them a detailed scope with costs before proceeding.
Step 11: Conduct a Plumbing Pressure Test after Repairs
Ensure a professional plumber performs a pressure test after repairs to verify that all pipe breaks have been properly fixed and that the plumbing system is functioning correctly.
This Weekly Hands-On How-To was based on the template Assess a Home with Frozen Pipes in KnowHow’s template library.
While some of these steps might feel second nature to your team, KnowHow’s research of over 400 workers in the restoration industry revealed that almost half of all new staff in the industry have never worked in general construction before. That’s why it’s critical that whether you’re addressing frozen pipes or getting up to speed with essential software like Xactimate, Encircle, Dash, and more, your team has a single source of truth for how to do their job competently and confidently.
For more information about KnowHow, head to tryknowhow.com
Looking for a reprint of this article?
From high-res PDFs to custom plaques, order your copy today!


