The Basics of Moisture Detection Equipment

Photos courtesy of Chris Spensley.
Photos courtesy of Chris Spensley.
Photos courtesy of Chris Spensley.
Using the proper piece of moisture detection equipment at the appropriate time is essential for a professional water damage restorer to accurately collect data in affected and unaffected areas, monitor drying progress throughout the course of the drying effort, and determine when affected materials have reached the drying standard. Too often, companies fall short in training technicians on what meters to use in certain situations, and as a result come up with inaccurate moisture readings and insufficient moisture mapping results.
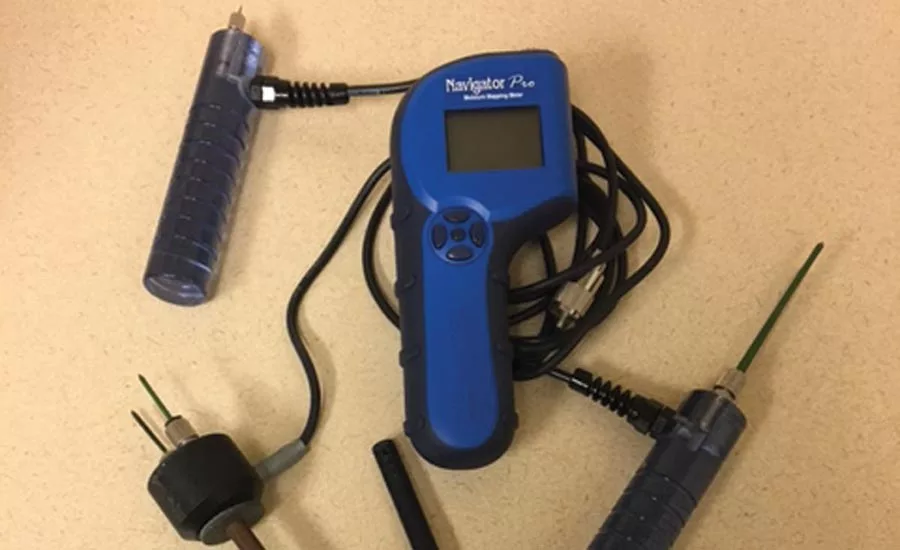
Though technology has increased greatly over the last decade, many of the same principles of moisture detection still apply as they did years ago. Technicians are to meter unaffected areas in the structure to formulate a dry standard for the project (and use historical knowledge if unaffected materials aren’t present), and declare the drying project “done” once affected materials have reached these goals. The two basic types of moisture detection equipment, moisture meters and moisture sensors, still exist today as they did in the past. The moisture meter produces a numerical readout telling the technician how much moisture a material contains, while the moisture sensor simply tells whether a material has elevated moisture with an audible beeping sound.
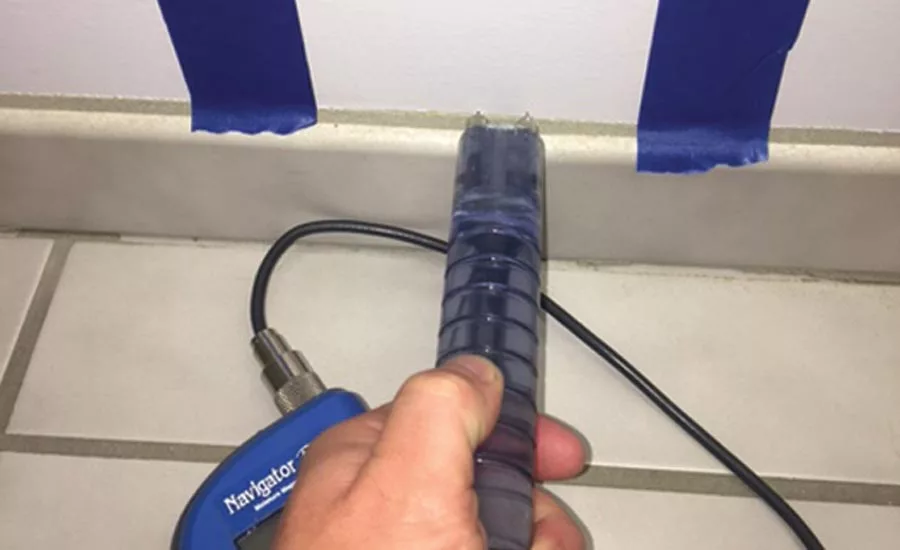
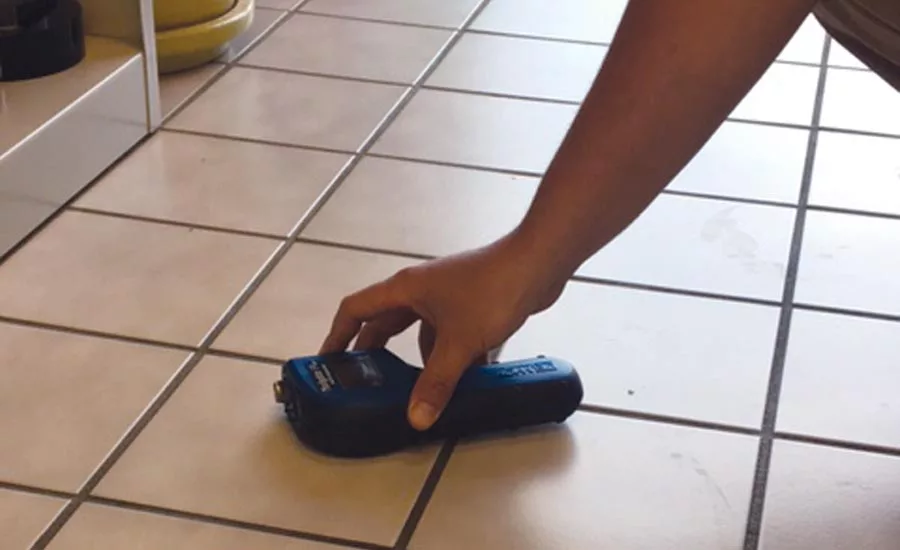
Taking moisture readings off of building materials such as drywall, insulation, carpet, carpet pad, and subflooring is relatively easy when using the proper moisture meter. Penetrating meters obviously cannot be used in cases where the finish material will be permanently damaged and not easily repaired, or when the finish side of the surface is hard and won’t allow their use. In these cases, technicians are left to use non-penetrating meters on the top side of the material, and if possible, the use of a penetrating meter from below.
Still, technicians often struggle when the scope of the job includes materials such as ceramic tile, plaster, hardwood flooring, and several other Class 4 materials that are commonly found in today’s homes. Often, these materials are installed in such a way where they cannot be metered from below, and a technician is left to solely using a noninvasive-type meter. In these circumstances, taking multiple readings in the same area will likely be necessary to guarantee accuracy. Of course, attention must be paid to whether a vapor barrier or insulation is behind these materials. If their presence is known or suspected, more invasive means will need to be taken.
It is industry standard to monitor structural drying projects daily and to meter the exact same areas as the day prior in order to accurately measure whether progress is being made. In a perfect world, the same technician will be monitoring his or her job every day. However, as restoration companies grow and company structures change with increased workloads, this often isn’t the case. When different technicians will be monitoring jobs performed by their coworkers, a numbering system should be used in order to ensure the proper locations are being measured in the subsequent monitoring days. Simply put, use a piece of blue painters tape with a number to mark the location that corresponds to a number in the job’s drying log.
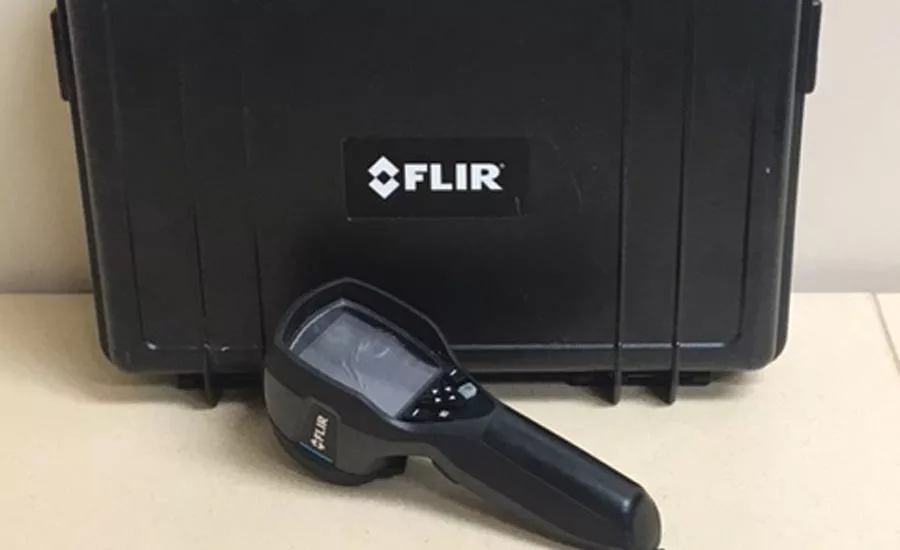
Thermal imaging cameras have become increasingly popular in the water damage industry over the last decade. Their quick surveying capabilities, ability to show the client damage on an easy-to-understand visual screen, and ease of use in situations when trying to assess hard-to-reach areas make them a very valuable tool for today’s professional restorer. However, the information yielded from these cameras cannot be numerically added to a drying log and thus should be used for basic inspection purposes only. Never should a drying project be deemed complete solely from the use of a thermal imaging camera.
Several tricks and tips to make your use of moisture meters more efficient and effective are as follows:
- Penetrating moisture meters cause permanent damage to surface materials, so use them only when confident that the material is wet. Use non penetrating meters when looking for potential moisture issues.
- Non-penetrating moisture meters are more likely to give off false positives as they can be affected by materials such as wire mesh, metal wall framing, and nails or screws.
- When possible, metering a flooring material such as hardwood or ceramic tile from the room side with a non penetrating meter and from below with a penetrating meter will yield the most accurate results.
- Follow the proper scale in relation to the material you are trying to read. Normally, wood materials are expressed as a percentage and others are expressed on a points scale.
- All-in-one type moisture meters are incredibly convenient to a restorer; however their repair costs often far outweigh that of their more basic counterparts.
- Depending on make and model, non penetrating moisture meters read roughly 3/4’’ into a material, so ensure there is no possibility moisture has traveled deeper than what your meter can detect.
- Follow the owner’s manual to periodically check if your moisture detection equipment is calibrated properly.
Finally, a restorer’s intuition and judgment must be used when interpreting data from moisture readings. Things that don’t seem to make sense are likely indicators of an inaccurate reading and will require further investigation to determine the cause. Accurate moisture readings are the backbone of a solid job file and typically lead to a happy customer and quick payment.
Looking for quick answers on restoration, remediation and cleaning topics?
Try Ask R&R, our new smart AI search tool.
Ask R&R →
Looking for a reprint of this article?
From high-res PDFs to custom plaques, order your copy today!


