Weekly Hands-on How-To powered by KnowHow
How To Collect Asbestos Samples
Master the Art of Drying Hardwood Floors, without Guesswork
Image provided by KnowHow.
When dealing with water damage in older buildings, it’s not just moisture you’re dealing with—it’s history. And sometimes, that history comes with asbestos.
Before you start any demolition or drying work, you need to know whether you’re about to disturb asbestos-containing materials (ACMs). If you skip this step, you risk contaminating the site, endangering your crew, and landing in serious legal trouble.
This step-by-step guide, powered by KnowHow, walks you through the essentials of safe and compliant asbestos testing—from understanding who’s legally allowed to collect samples to setting up containment and properly documenting every detail. Built on EPA regulations, OSHA requirements, and IICRC S550 standards, it’s the playbook restoration teams rely on to stay safe and stay legal.
Please ensure you have all the proper licenses and required certification before collecting asbestos samples.
1. Stop Work Immediately if ACMs Are Suspected
If you come across materials that may contain asbestos, stop all work in the area immediately. Proceeding without testing poses serious health risks and can lead to legal violations. Follow your company’s procedure on how to recognize asbestos risk and prepare for formal testing.
2. Know Who Can (and Can’t) Collect Asbestos Samples
When it comes to asbestos, there’s no room for guesswork. The law is clear: only individuals or organizations with the proper training and certification can legally collect asbestos samples—and for good reason. Mishandling asbestos can release harmful fibers into the air, putting people’s health at serious risk and opening up your company to liability.
Here’s who can legally collect asbestos samples in the U.S.:
-
Certified Asbestos Inspectors
Individuals who hold certifications as asbestos inspectors, which typically require training and passing an exam. They are qualified to collect samples from buildings, industrial settings, or other locations suspected of having asbestos.
-
Asbestos Abatement Contractors
Professionals who are licensed and certified in asbestos abatement (removal and handling). These contractors can collect samples as part of their initial inspections before performing abatement or removal services.
-
Environmental Consultants
Specialized environmental consultants, often employed by environmental firms, may also be authorized to collect asbestos samples if they have the proper certification and training.
-
Regulatory Agencies
Government regulators, including OSHA (Occupational Safety and Health Administration), EPA (Environmental Protection Agency), or local health and safety agencies, can collect samples as part of regulatory compliance or investigations.
That said, certification alone isn’t enough. There are strict legal requirements that must be followed before, during, and after sample collection:
-
Training & Certification
To handle or collect asbestos samples safely, individuals must undergo specific training programs that meet state or federal regulations, like those set by the EPA or the Occupational Safety and Health Administration (OSHA).
-
Safety Protocols
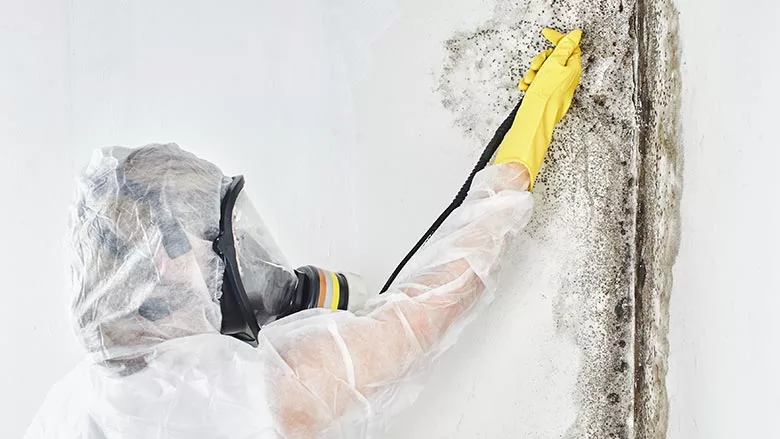
Asbestos sampling and testing involve handling hazardous materials. Special care must be taken to avoid disturbing the asbestos and causing airborne particles, which could be harmful to health. Thus, individuals obtaining the samples must use proper personal protective equipment (PPE), containment procedures, and disposal methods.
To sum it up: while anyone could physically take a sample, only certified professionals should—and legally can. This protects not just the technician, but also the building occupants, your company, and the environment.
3. Prepare the Site for Sample Collection
Identify materials that appear suspect, and shut down HVAC systems to prevent the spread of airborne fibers. Limit all foot traffic in the area to reduce disturbance. Your goal is to keep the environment as stable and undisturbed as possible until containment and collection are complete.
4. Gather the Right Tools and PPE
You’re working with potentially deadly fibers—gear up accordingly.
Personal Protective Equipment (PPE):
- Disposable coveralls
- Respirator with P100 filters
- Safety goggles
- Disposable gloves
- Boot covers or work-specific boots
Sampling Tools:
- Sharp knife, corer, or scraper
- Spray bottle with water + detergent
- Ziploc bags or airtight containers
- Permanent marker for labeling
- Disposable wipes
- Sealed disposal bags
Don’t cut corners—double-check that your equipment is in good working order before you begin.
5. Contain the Sample Area
Set up a full containment zone where sampling will occur. Use 6-mil polyethylene sheeting or stronger, and secure it tightly with preservation tape. Install an air scrubber with HEPA filtration to help remove airborne fibers during the process.
6. Wet the Sampling Area
Before disturbing any suspect material, lightly mist it with a mixture of water and detergent. The goal isn’t to soak it—but to dampen the area just enough to reduce airborne fiber release during cutting. This step is critical for safety.
7. Collect the Asbestos Sample
Carefully cut or scrape a representative portion of the material. For friable materials (like popcorn ceilings), collect at least a teaspoon. For non-friable (like tile), gather at least a 1-inch square sample. Ensure you sample through the full material depth.
Special Considerations:
- Popcorn Ceilings (1000+ sq ft): Take at least 3 samples from different areas.
- Flooring Adhesives: Include the mastic layer.
-
Vermiculite Insulation: Take a full cup from multiple spots.
8. Secure and Label the Sample
Immediately place the sample in a Ziploc bag or airtight container. Seal it thoroughly and clearly label it with a unique identifier like “Sample #1.” Keep it separate from other samples to avoid cross-contamination.
9. Clean the Sampling Area
Using a damp disposable cloth, wipe down all surfaces where work occurred. This removes any stray fibers and reduces the chance of secondary contamination. Seal all used wipes and disposable gear in a dedicated waste bag for proper disposal.
10. Document Everything
Good documentation isn’t optional—it’s essential. Record the following for each sample:
- Sample ID
- Date of collection
- Location and material description
- Inspector’s name and certification number
This record forms part of your legal compliance and protects both you and your client.
11. Submit Samples for Laboratory Testing
Send your samples to an accredited asbestos testing lab. Make sure they are packaged according to the lab’s requirements and include a completed chain of custody form. Tracking ensures the integrity of your results.
12. Perform a Final Safety Check and Report Findings
Once the sample is submitted, safely remove and dispose of PPE according to hazardous material guidelines. Decontaminate any reusable tools and wash hands thoroughly. Then, deliver your findings, along with any recommendations, to the project supervisor or property owner.
Safety Isn’t Optional—It’s Step One
Testing for asbestos isn’t just a box to check—it’s a critical first step that protects your team, your clients, and your company’s future. Whether it’s identifying risk, setting up proper containment, or submitting samples to a certified lab, every step matters. And when the stakes are this high, there’s no room for shortcuts. That’s where KnowHow comes in.
KnowHow gives your team instant access to expert-vetted procedures, safety protocols, and training tools—so even the most complex and compliance-heavy tasks get done right, every time. From pre-demo asbestos testing to full abatement workflows, it makes it easy to keep your crew confident, compliant, and consistent on every job.
Want to give your team a head start? Download the free asbestos testing template and book a demo to see how KnowHow helps you raise the bar for safety and professionalism across your entire operation.Looking for a reprint of this article?
From high-res PDFs to custom plaques, order your copy today!

