Weekly Hands-on How-To powered by KnowHow
How to Properly Remove Drywall
A Step-by-Step guide for industry professionals

All images provided by KnowHow.
Whether it’s for water damage remediation, mold removal, or preparing a property for reconstruction, removing drywall is a foundational step in many restoration projects. But it’s not just about swinging a hammer and tearing down walls—it’s about precision, care, and minimizing disruption. Improper removal can lead to unnecessary mess, hidden damage, or delay the process.
By following the right steps, you can ensure a clean and efficient process that sets the stage for successful reconstruction. In this how-to, powered by KnowHow, we’ll guide you through the best practices for drywall removal, so your team can approach every project with confidence and professionalism.
So, grab your dust masks and utility knives, and let’s tear into this one!
Note: This Weekly Hands-On How-To was based on this template in KnowHow’s template library.
Step 1: Determine How Much Drywall to Remove
The first step in drywall removal is to evaluate the affected area and decide how much drywall needs to be taken out. This is critical for addressing moisture damage, preventing further issues, and ensuring an efficient restoration process.
- Visual Inspection: Look for discolored or damaged drywall, which often indicates prolonged exposure to moisture. Be mindful of potential mold growth on the backside, as this is a common issue when drywall remains saturated for an extended period.
- Use a Moisture Meter: A high-quality moisture meter is essential for assessing the damage. Start by finding a known dry area to establish the "dry standard" or baseline reading for that specific home or region. Then, use the meter to determine the extent of moisture intrusion and mark the areas needing removal.
For more detailed guidance, refer to the KnowHow process on how to Determine When to Remove Drywall During Mitigation.
Step 2: Gather the Necessary Tools
Proper preparation begins with gathering all the tools and materials needed to ensure a smooth and professional drywall removal process. See below for a checklist of all required tools.
Tools and materials checklist:
- Chalk line: Ensures straight, precise cuts for easy replacement later.
- Dust mask: Protects you from inhaling harmful dust particles.
- Utility knife: Perfect for cleanly cutting edges and corners where saws cannot reach.
- Drywall saw with vacuum attachment: Minimizes dust while cutting, with the blade depth set to 1/4 inch to avoid damaging wires or framing.
- 4-6 Mil plastic: Used to create containment and protect the surrounding area.
- Containment poles and zipper: Helps set up a controlled containment zone and provides easy access to the work area.
- Cleaning supplies: Ensure the area looks clean and professional upon job completion.
Step 3: Contain the Area and Protect Furniture/Contents
Containing the workspace is essential to prevent dust and debris from spreading throughout the property. This step is crucial for minimizing cleanup time and safeguarding the homeowner’s belongings. Neglecting it could lead to costly additional cleaning efforts and a poor customer experience.
- Set up a containment zone using plastic sheeting, containment poles, and a zipper for controlled access.
- Place an air scrubber in the contained area to reduce airborne particles and maintain air quality.
- Remove furniture and contents. If removal isn’t feasible, cover and protect all items to prevent dust accumulation

Step 4: Mark Off the Area to Be Removed
To ensure straight and precise cuts, take the time to properly mark the drywall that needs removal. Use your chalk line to create clear, straight guidelines for cutting. Accurate markings not only facilitate clean removal but also make replacement much easier for drywall installers.
Step 5: Begin to Remove the Drywall in Sections
Once the area is prepped and marked, it’s time to carefully remove the drywall piece by piece. This step requires precision and attention to detail to ensure the job is done efficiently and cleanly without causing additional damage to the property.
Follow these steps for effective drywall removal:
- Lay Protective Coverings: Place plastic sheeting or drop cloths on the floor of the contained area to catch debris and maintain cleanliness. This reduces cleanup time and minimizes the risk of spreading dust.
- Cut Along the Chalk Line: Use a drywall saw to cut along the chalk lines you marked earlier. Take your time to ensure straight, clean cuts, which will make the replacement process smoother.
- Use a Utility Knife for Corners: In areas where the drywall saw can’t reach, like corners, use a utility knife for precision cutting.

Step 6: Stop and Inspect Behind the Drywall
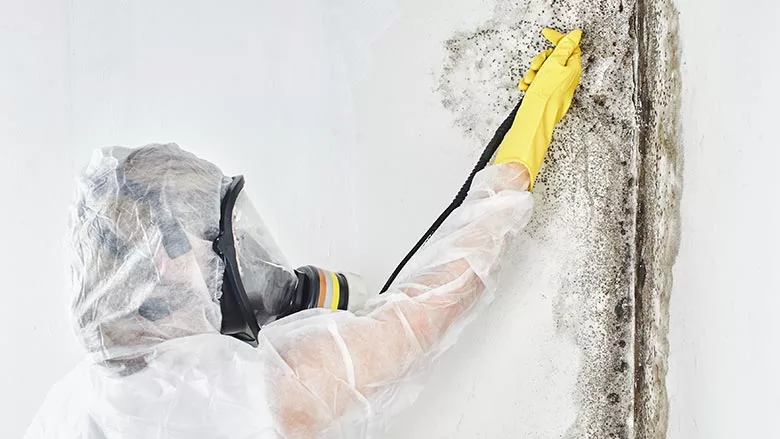
Before proceeding with complete removal, inspect the area behind the drywall for hidden issues. Look for mold growth or other damage. If mold is present and exceeds 10 square feet, seal off the area immediately and notify your supervisor, as specialized remediation will be required.
Step 7: Complete the Removal
If the inspection reveals no significant issues, proceed with removing all marked drywall. Follow the guidelines established earlier to ensure the removal is clean and efficient, and take care not to damage the underlying wall framing or adjacent surfaces.
Step 8: Clean Up and Dispose of Waste
A thorough cleanup is the hallmark of a professional job and leaves a positive impression on the homeowner. This final step not only ensures a spotless work area but also helps build trust with the homeowner by showcasing your commitment to quality and cleanliness.
- Vacuum all drywall remnants from the wall framing and floor to eliminate dust and debris.
- Place removed drywall in 3-mil garbage bags, seal them tightly, and safely remove them from the containment area.
- Keep the air scrubber running in the containment zone for at least 24 hours to capture remaining airborne dust particles.
Setting the Stage for Success With KnowHow
Removing drywall may seem like a straightforward task, but it’s one that requires precision, attention to detail, and a commitment to cleanliness. Every cut, containment measure, and cleanup effort plays a crucial role in the overall success of the mitigation process. KnowHow ensures that restorers are equipped to handle this task with confidence.
From step-by-step guidance on proper techniques to tips for maintaining professionalism and customer trust, KnowHow helps you go beyond just completing the job—it helps you excel at it.
This drywall removal process is part of the Catastrophe Response Toolkit now available in KnowHow’s Industry Standard Template Library. Visit tryknowhow.com to explore this and the other essential tools designed to empower your team, streamline operations, and deliver exceptional results on every project.
Looking for a reprint of this article?
From high-res PDFs to custom plaques, order your copy today!


.webp?height=200&t=1712776413&width=200)

