Weekly Hands-on How-To powered by KnowHow
How to Test for Mold with a Swab Test Kit
This Week’s Hands-On Segment Focuses on techniques for conducting a thorough mold swab test

While mold is a silent invader, its effects are anything but subtle. After water damage occurs, unseen mold will begin to flourish and typically hides beneath surfaces and within walls.
But though mold may be out of sight, it shouldn’t be out of mind. Serious health issues and structural damage occur if the mold is not promptly and properly addressed. As restorers, knowing the mold identification and detection steps is a critical skill and will be used on almost every water damage restoration job to ensure the safety and longevity of your client’s home.
So, in this article, we welcome you to Mold May, powered by KnowHow! We’ll walk you through the correct techniques for conducting a thorough mold swab test. Whether you’re a novice stepping into the world of mold remediation or a seasoned professional honing your skills, this article offers clear, step-by-step instructions and expert tips to enhance your ability to detect and address mold efficiently.
Let’s gear up and dive into the details of mold detection, starting with the essential tools and progressing through the proper procedures to ensure that every test contributes to a comprehensive understanding of the mold situation.
We’ll have more mold-themed how-to guides throughout the month.
Note: This Weekly Hands-On How-To was based on this template in KnowHow’s template library.
Step 1: Prepare the Swab
Begin by donning gloves and PPE. Then, carefully remove the swab from its packaging. If you observe more than 10 square feet of mold growth, consider contacting an Industrial Hygienist to perform the testing and develop a remediation protocol.
Industrial Hygienists will ensure safety and accuracy in handling extensive mold contamination and ensure that there are minimal hiccups throughout the claims process.
Step 2: Collect the Sample
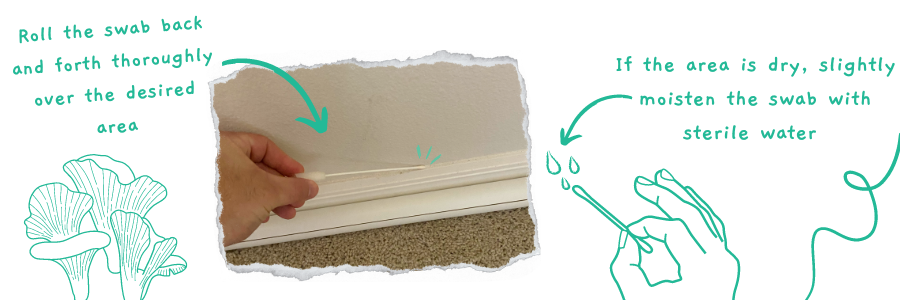
Gently roll the swab back and forth over the desired testing area. Make sure that you swab adequately to cover all parts of the affected area to collect a thorough sample.
Best Practices:
- Use moderate pressure while swabbing to ensure enough material is collected without damaging the surface.
- If swabbing a dry area, moisten the swab slightly with sterile water to help pick up spores.
Step 3: Secure the Sample
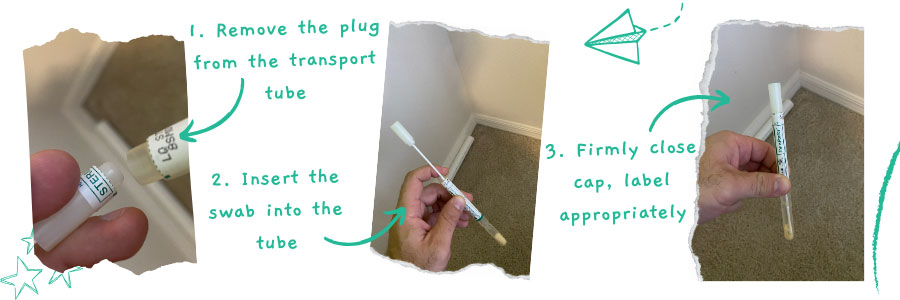
Place the swab into the transport tube and securely close the cap to avoid contamination. Label the tube clearly with the necessary sample details to ensure accuracy in testing and tracking.
Best Practices:
- After sealing the tube, shake it gently to ensure the sample is well distributed within the preservation medium.
- Double-check the label for any misspellings or missing information, as accurate labeling is crucial for lab analysis.
Step 4: Fill Out the Data Sheet
Complete the chain of custody form, starting from initial collection, and ending at the lab that will complete the testing. Specify the turnaround time and type of test you are requesting.
The chain of custody ensures the sample’s identity and integrity by documenting every handler and phase of the sample’s journey, including the collector’s initials, custody details, collection dates and location, a brief description, and a unique sample identification number.
Step 5: Specify Testing Requirements
Indicate whether the sample should undergo a direct examination or culture analysis. A direct examination helps identify the types of fungi from visible mold, examining fungal spores and structures, while culture analysis cultivates the sample on media to identify fungi over a period of up to two weeks.
Step 6: Send the Sample to the Lab
Verify which labs are accredited in your state for mold analysis. Package the sample according to the chosen lab’s specifications and send it as soon as possible, overnight if needed, to ensure it arrives in good condition.
Test More Than Just Mold With KnowHow
Following the steps in this guide not only equips you with the necessary tools to effectively detect mold but also sets the stage for comprehensive remediation. By using KnowHow's Industry Standard Restoration Templates, you ensure that every task is executed with precision, and complex challenges become easily manageable tasks.
Now that we've honed your mold detection skills, let's expand your horizons. KnowHow offers much more than just templates; it provides a robust suite of AI-powered tools to support onboarding, ongoing training, and instant answers to restorers in the field.
Whether you're enhancing the capabilities of seasoned staff or guiding new technicians, KnowHow empowers your team to face any restoration challenge with confidence. Discover the full potential of KnowHow at tryknowhow.com and take every step towards success with confidence.
Looking for a reprint of this article?
From high-res PDFs to custom plaques, order your copy today!


.webp?height=200&t=1729002037&width=200 "Weekly Hands-On How-To: How to Test for Colorfastness on Upholstered Furniture")

