Thermal Imaging: It's Cold, Not Wet!
Tech tips for busy restorers.
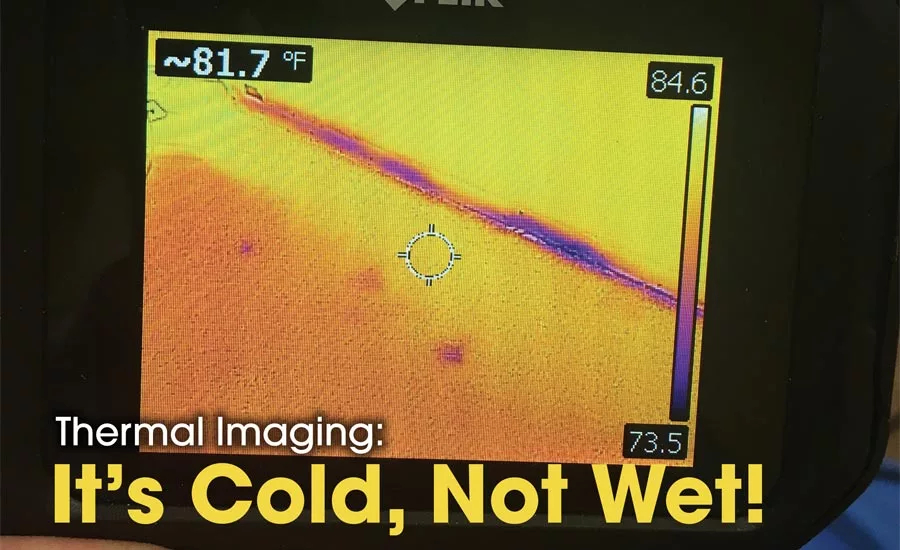
This thermal image temperature difference is a clearer indicator of moisture, than a mere difference between hot and cold surfaces.
Thermal imaging cameras are pretty cool…… let’s admit it most of us have been wanting one since we first watched the predator movies with Arnold Schwarzenegger in them, so coming up with a good business reason to have one is pretty great. All jokes aside I will say I am a strong advocate for adding tools to your belt that will help you better inspect losses and provide more info to your customers. Also with this tool it’s an added plus that it can also save you some time by speeding up the initial moisture mapping process. Imagine scanning all walls with a non-invasive meter on a commercial loss to identify affected areas.
With all that positive being said, the IR camera is probably right up there as one of the top three misunderstood and misused tools in our trade. That is pretty scary since it can suggest that large amounts of square feet are affected to the untrained technician causing major differences in scope of work. I know that sounds like a good thing but trust me it is not. Remember, we are skilled tradespeople and we should never think of ourselves as equipment rental companies only.
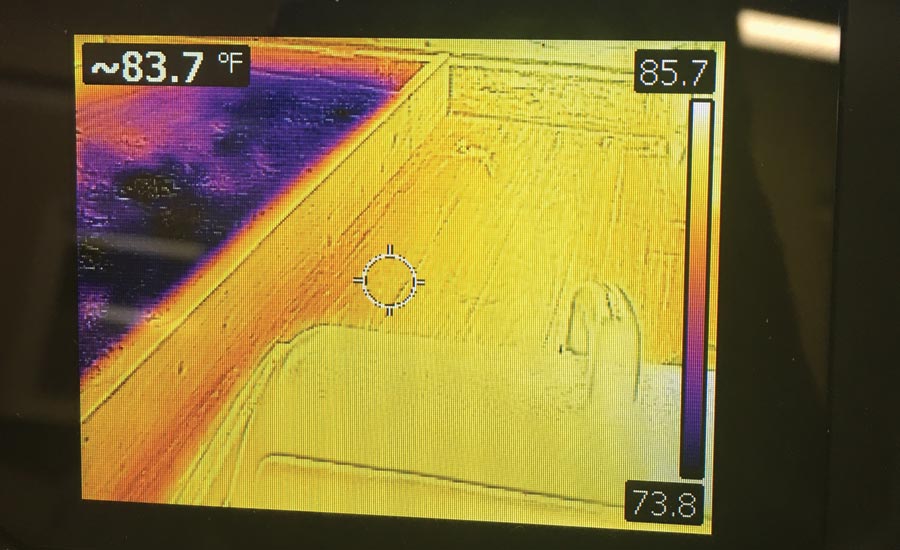
It’s Reading Surface Temp, Not Moisture!
IR cameras show the heat emitted from surfaces and do not in any way accurately show moisture content. Sure if you are on a water loss and the carpet is wet and evaporation occurs on its surface it will cool and appear colder than the dry carpet beside it ……. But the exterior wall will also show up colder than the interior wall as well in the winter. A cold surface could be correlated to a moisture reading but that is not a guarantee. Remember to always verify if it’s just cold or if it’s really wet by using your moisture meter in combination with the IR camera. If you’re concerned about putting holes in the wall then consider starting with a non-invasive meter to make sure it’s wet before actually inserting pins into the material to prevent an unnecessary invasive inspection.
This is an example of something being cold, not wet. The crawlspace dirt is colder than wood.
Not All Are Created Equal
IR cameras are not all created the same so you will get a large difference in cost between high and low end models. Just know that $200 is probably too cheap and if you’re paying over $2,500 I would say you should either understand the differences or you’re probably going above your needs, given that’s just my professional opinion. You are paying for the sensitivity of how small of a temperature difference you can get and how long it takes to acclimate and calibrate to what’s in focus on the screen. So with that being said if you have a cheaper model you need to pan (move the camera) slowly and make sure your in calibration and the colors are all set before you take a photo.
Hot & Cold are Relative to What’s in the Photo
Try to control what is in front of the camera frame. Remember if you are looking at a ceiling and a fluorescent light is in the picture it’s going to give you some info you may misunderstand if you’re not careful. It usually shows red as hotter and blue as colder so if you have a light in frame of the photo you will likely get a red light and a lot of blue ceiling area around it, because hot and cold are relative to what’s in the photo frame. If you can, move just a little over and get a photo with only the ceiling in frame so you get a more accurate temperature difference.
If You’re Going to Invest, Use It & Document It
I often get asked at Xactimate estimating courses I teach “how to bill for the use of the camera” and I always tell everyone it used to be around a couple hundred dollars for WTR THERM in pricelist but now it’s a bid item which means you decide what to charge. I believe the problem most often is that some use the tool but don’t document it and it makes it harder to justify paying the cost. If you purchase and use the tool, take credit for it and use the additional documentation in the file. IR photos are extremely helpful if used correctly in sharing what areas of surfaces are wet and affected the first day of the loss. Make sure you upload the pictures to your moisture mapping or job management system or to a cloud or to Xactimate, anywhere really, just make sure you document the images and share them with all parties. This helps everyone involved manage risk on the loss and better describe it to third parties.
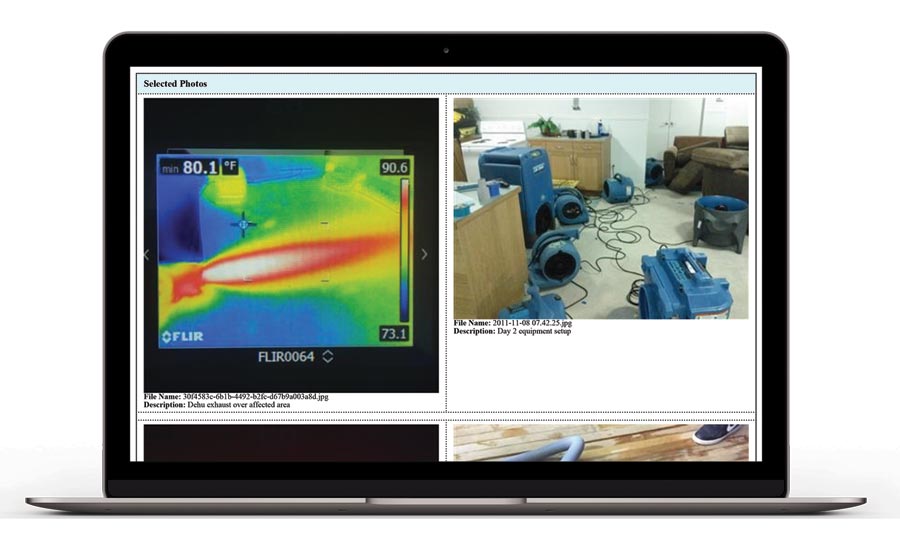
Moisture mapping + thermal imaging.
Congrats if you are already using an IR camera in the field properly in our industry, and if you are not luckily no one really knows unless they have trained or read this article LOL but now you have some additional knowledge on how to best use your device and to get the best information out of it. Remember tools are only as good as the person using them and in this industry many of our meters can give both false positive and negative readings. Know your tools even if it’s just reading an owner’s manual once a quarter as a team or reading an article like this once a month make sure your paying attention to your craft. If you would like to get more info I know FLIR has a great training program where you can get certified as a level 1-3 thermographer.
Keep drying.
Looking for quick answers on restoration, remediation and cleaning topics?
Try Ask R&R, our new smart AI search tool.
Ask R&R →
Looking for a reprint of this article?
From high-res PDFs to custom plaques, order your copy today!


")
